 Save
Save I stumbled onto these protein cheesecake cups by accident one Tuesday afternoon when I was staring at a tub of Greek yogurt, a block of cream cheese, and absolutely no willpower to bake a traditional dessert. What started as a lazy idea—what if I just mixed these together?—turned into something I'd make again and again, not because it was healthy, but because it tasted genuinely indulgent while actually being good for me. The first time I pressed that oat base into a muffin liner, I felt like I'd cracked some kind of code. These little cups became my favorite way to satisfy a sweet craving without the kitchen disaster.
I made these for a friend who was training for a marathon, and watching her face when she realized these were both delicious and actually nutritious was worth every minute of prep. She ate two in one sitting and asked for the recipe before even finishing. Now whenever I bring them to anything, people assume I bought them from some fancy bakery, which I absolutely let them believe.
Ingredients
- Oat flour: The foundation that gives you texture without heaviness—I learned to press it down really firmly so it holds together like a proper crust and doesn't crumble when you bite into it.
- Almond or peanut butter: This binds everything and adds richness that makes the base taste intentional rather than obligatory.
- Honey or maple syrup: Just enough sweetness to make the base taste like dessert, not like health food trying too hard.
- Cream cheese: Softened is key here—if it's cold, you'll end up with lumps no matter how hard you mix, and that's a frustration I've lived through.
- Greek yogurt: This keeps things light while the protein powder keeps things substantial, and the tanginess cuts through the sweetness perfectly.
- Vanilla whey protein powder: Two scoops gives you the protein boost without that chalky aftertaste if you use a decent brand.
- Lemon zest: Optional but not really—it adds brightness that makes people pause and ask what that subtle flavor is.
Tired of Takeout? 🥡
Get 10 meals you can make faster than delivery arrives. Seriously.
One email. No spam. Unsubscribe anytime.
Instructions
- Build Your Base:
- Combine your oat flour, nut butter, sweetener, and salt in a bowl until it looks like wet sand. Press it firmly into muffin liners—this is where patience pays off, because a loose base will fall apart on you.
- Whip the Filling:
- Beat the softened cream cheese until it's smooth and lump-free, then fold in the yogurt, protein powder, and vanilla. The mixture should be thick and creamy, not runny.
- Layer and Top:
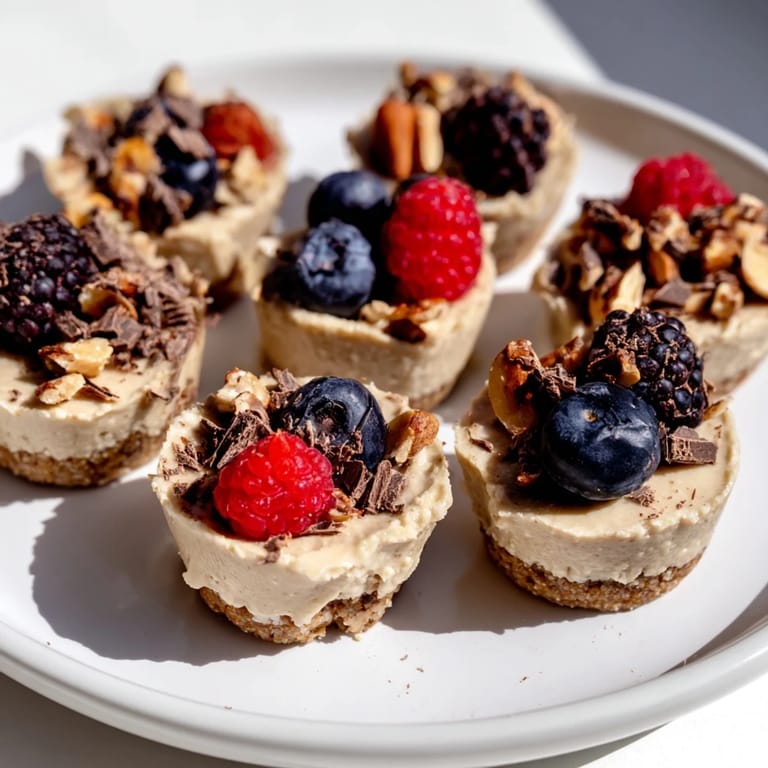
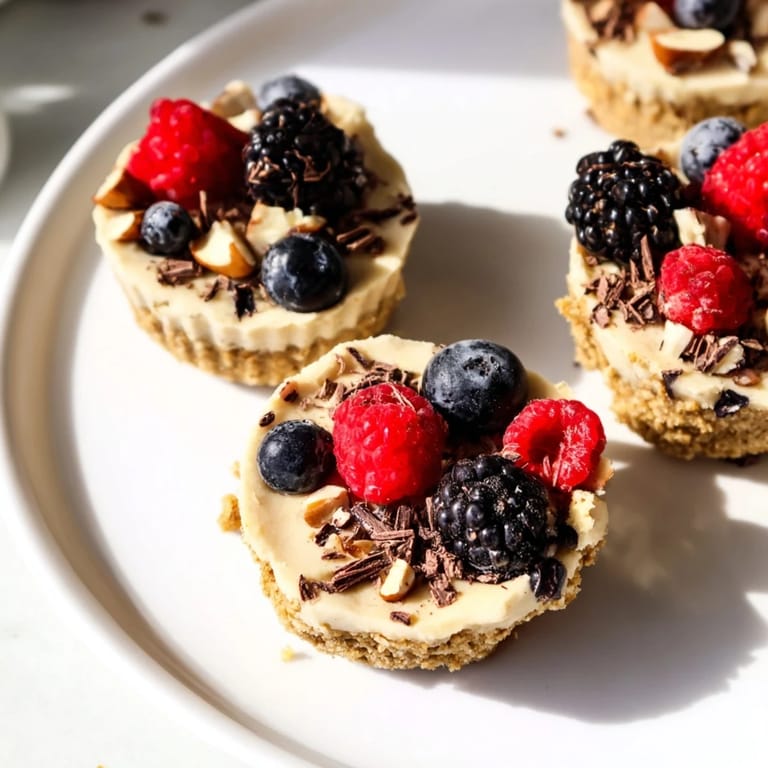
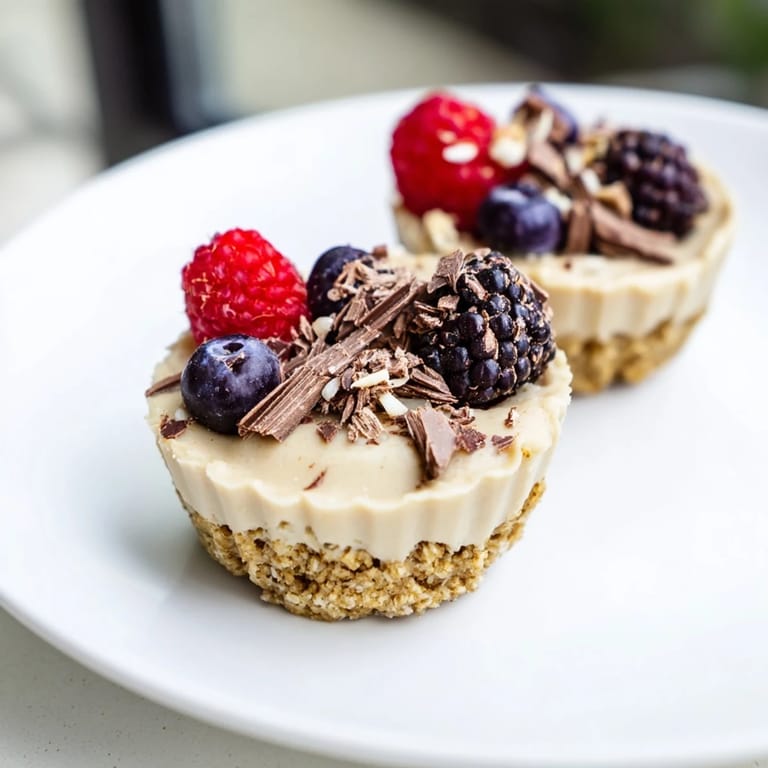
- Spoon the cheesecake mixture generously over each base and smooth the top with a spatula. Add berries, nuts, or chocolate shavings if you want them to look intentional.
- Chill Until Set:
- Pop them in the fridge for at least two hours—this is not optional if you want a clean bite rather than a soupy mess. Overnight is even better.
 Save
Save There was something almost meditative about making these for the first time, knowing I could eat something that actually tasted indulgent without spending the next two hours feeling sluggish. It changed how I thought about what "healthy eating" could taste like.
Making Them Your Own
The beauty of these cups is how customizable they are without losing what makes them special. I've swapped vanilla protein for chocolate, added crushed graham crackers to the base instead of using pure oats, and once even added espresso powder to the filling because I was tired and needed coffee flavored dessert. Each version worked because the core ratio stayed the same—the balance between the tangy filling and the crunchy base is what actually matters.
Storage and Make-Ahead Magic
These keep for almost a week in the fridge, which is the kind of thing that changes a busy week for me. Make them on Sunday and you have guilt-free snacks waiting, no decision-making required. I've also frozen them successfully, though they take about thirty minutes to thaw and taste slightly different—softer, almost creamy—which honestly isn't worse, just different.
Flavor Combinations That Work
Once you've made the basic version a few times, you'll start seeing the endless possibilities. The filling is basically a blank canvas that plays well with almost anything—I've added almond extract, coconut, cinnamon, and even a hint of cardamom when I was feeling fancy. The toppings are where you can really have fun, layering flavors that make each bite feel different from the last.
- Try pairing a chocolate protein base with crushed pistachios and dark chocolate shavings for something that feels decadent.
- Berries are the obvious choice, but a spoonful of jam or fruit compote on top adds complexity and keeps things interesting.
- Fresh mint leaves look nice and taste crisp against the creamy richness, if you remember to add them right before eating.
 Save
Save These cups have become my answer to the dessert question when I want something that tastes good and doesn't make me feel like I'm punishing myself for wanting something sweet. They're proof that indulgence and nutrition aren't always enemies.
Kitchen Guide
- → What ingredients create the base of the cups?
The base is made from oat or almond flour combined with almond or peanut butter, honey or maple syrup, and a pinch of salt, pressed firmly to form a crunchy crust.
- → How is the creamy filling prepared?
The filling blends softened cream cheese, Greek yogurt, vanilla protein powder, honey or maple syrup, vanilla extract, and optional lemon zest, beaten until smooth and creamy.
- → Can these cups be made gluten-free or vegan?
Yes, substituting oat flour for almond flour and using dairy-free cream cheese, plant-based yogurt, and vegan protein powder makes the cups gluten-free and vegan-friendly.
- → What toppings complement these cups best?
Fresh berries, chopped nuts, and dark chocolate shavings offer great texture and enhance the flavor profile when added as toppings.
- → How long should the cups be chilled?
Chill the cups for at least 2 hours to ensure they set properly and achieve the desired firmness.
- → Are these cups suitable as a post-workout snack?
Yes, their high protein content and balanced ingredients make them excellent for replenishing energy after exercise.