 Save
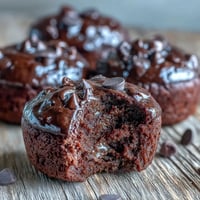
Save My neighbor showed up at my door one afternoon with a pan of these brownies, and I understood immediately why she'd been quiet about her baking experiments for weeks. The way the peanut butter cups melted into the fudgy crumb was almost unfair—like someone had engineered the perfect dessert and then decided to keep it simple enough that anyone could make it. I've been recreating them ever since, tweaking nothing, because sometimes a recipe arrives fully formed and you'd be foolish to mess with it.
I made these for my book club last month, and what struck me wasn't the compliments—though there were plenty—but how quickly they disappeared. Someone asked for the recipe while still chewing, which felt like the highest compliment possible. The brownies had done their job: they'd made an ordinary Thursday evening feel a little more special.
Ingredients
- All-purpose flour (1 cup / 125 g): The foundation that keeps these brownies structured without making them cake-like; sifting isn't strictly necessary, but whisking it with the cocoa powder prevents lumps and distributes the leavening evenly.
- Unsweetened cocoa powder (1 cup / 80 g): This is where the deep chocolate flavor lives, so don't skimp on quality—Dutch-process cocoa gives you a slightly more sophisticated taste if you can find it.
- Baking powder (1/2 teaspoon): A small amount ensures a fudgy crumb rather than a dense brick; this is worth measuring precisely.
- Salt (1/2 teaspoon): Amplifies the chocolate and balances the sweetness in ways that won't announce itself but will be missed if forgotten.
- Unsalted butter (1 cup / 225 g, melted): Melting it first means you skip the creaming step and jump straight to glossy richness; using unsalted lets you control the salt level.
- Granulated sugar (2 cups / 400 g): The bulk of sweetness here, and whisking it with warm melted butter creates that signature shiny brownie top.
- Large eggs (4): Each one adds structure and moisture; adding them one at a time prevents the mixture from looking broken or curdled.
- Vanilla extract (2 teaspoons): A background note that makes chocolate taste more like itself, so use the real thing if possible.
- Semi-sweet chocolate chips (1 cup / 175 g): These melt slightly into the batter, adding extra fudginess and texture throughout.
- Mini peanut butter cups (16) or standard ones halved (8): The star hidden inside—they're more effective at their job when distributed evenly across the middle layer rather than clumped together.
Tired of Takeout? 🥡
Get 10 meals you can make faster than delivery arrives. Seriously.
One email. No spam. Unsubscribe anytime.
Instructions
- Prepare your pan and preheat:
- Line your 9x13-inch pan with parchment paper so it overhangs the edges slightly—this becomes your handle for lifting the cooled brownies out whole. Set your oven to 350°F and let it come to temperature while you mix.
- Combine the dry ingredients:
- Whisk together the flour, cocoa powder, baking powder, and salt in a medium bowl until they're evenly distributed with no cocoa streaks visible. This step prevents lumps from hiding in your final batter.
- Create the wet base:
- Pour the melted butter into a large bowl, add sugar, and whisk them together until the mixture looks glossy and slightly thick—this takes about a minute and signals you're ready for the eggs.
- Add eggs one at a time:
- Crack an egg into the butter-sugar mixture, whisk it in completely, then repeat with the remaining three eggs, waiting a moment between each addition so the mixture stays smooth. Once all eggs are incorporated, stir in the vanilla extract.
- Fold in dry ingredients:
- Pour the dry mixture into the wet ingredients and use a spatula to fold gently until you no longer see streaks of flour—overmixing here develops gluten and makes brownies tough instead of fudgy. Stop as soon as the mixture comes together.
- Add chocolate chips:
- Fold in the semi-sweet chocolate chips with just a few gentle strokes so they stay whole and distributed throughout.
- Layer the batter:
- Spread half the batter into your prepared pan in an even layer, using your spatula to smooth it out. Think of this as the foundation for the surprise inside.
- Arrange the peanut butter cups:
- Place your peanut butter cups in a grid pattern across the batter layer, leaving a little space between them so they have room to sit without touching. Evenly spaced cups mean every slice gets one.
- Cover with remaining batter:
- Spoon the rest of the batter over the peanut butter cups and gently smooth the top with a spatula so the cups are completely hidden and the surface is relatively even. Don't press down—let the batter naturally settle.
- Bake with care:
- Slide the pan into your preheated oven and bake for 28 to 32 minutes, checking around the 28-minute mark with a toothpick inserted into the center. You're looking for a few moist crumbs clinging to the toothpick, not a wet batter and not a completely clean center.
- Cool completely:
- Leave the brownies in the pan on the counter until they've cooled completely—this is crucial because they continue to set as they cool and are much easier to slice cleanly. Warm brownies will crumble; cold ones will cut like fudge.
- Remove and slice:
- Use the parchment paper overhangs to lift the entire brownie slab out of the pan onto a cutting board, then use a sharp knife (wiping it clean between slices) to cut into 16 even squares.
 Save
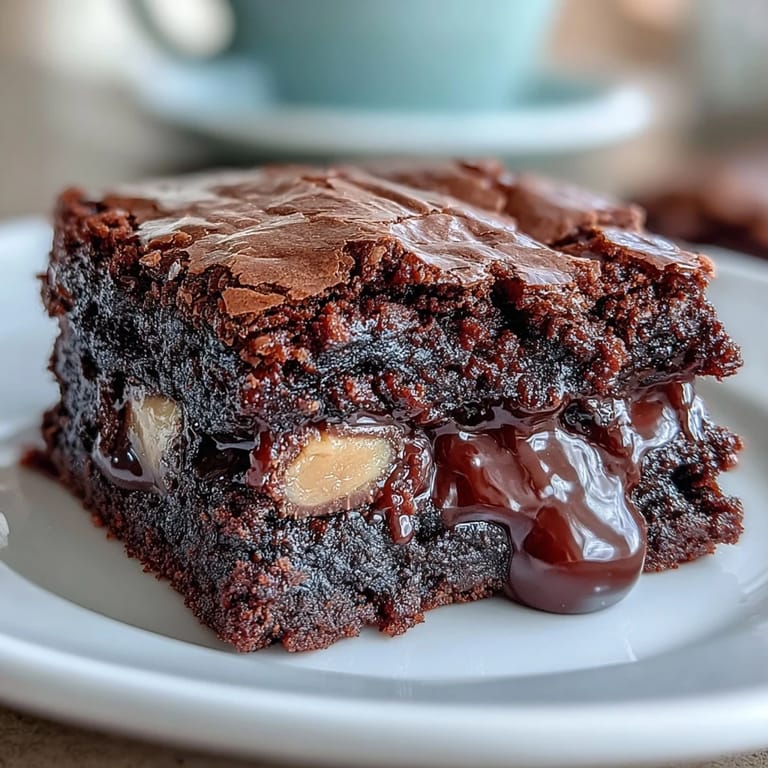
Save There's something satisfying about cutting into these brownies and seeing a peanut butter cup revealed in each square, like a little secret waiting in every bite. It's the kind of detail that makes people think you've put in more effort than you actually have, which might be the most valuable thing a recipe can offer.
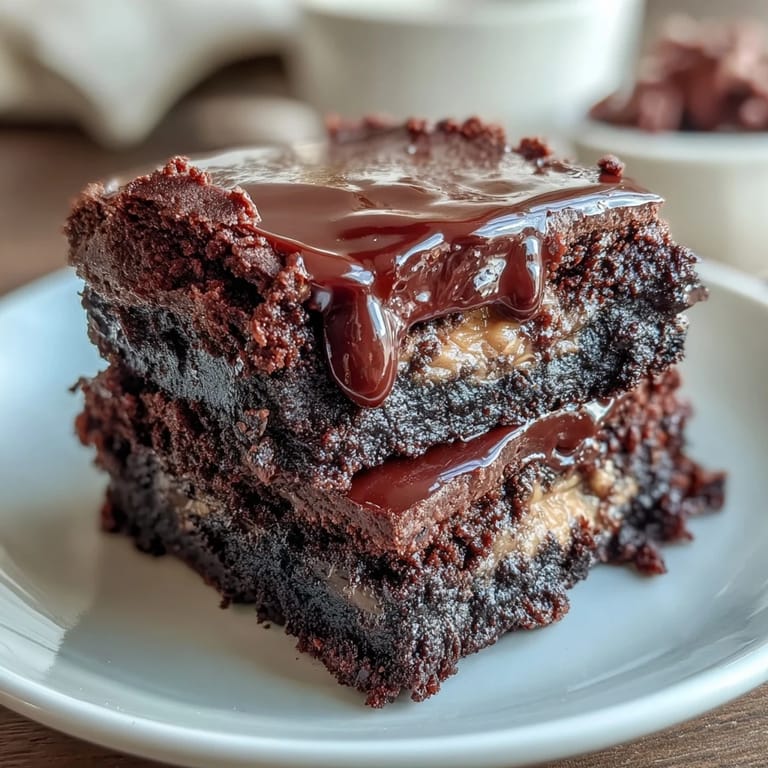
Why the Peanut Butter Cup Placement Matters
Burying the peanut butter cups in the middle layer instead of mixing them into the batter keeps them recognizable rather than dissolved. The bottom batter supports them, the top batter protects them, and when you bite through, you get a distinct moment of peanut butter richness that contrasts with the chocolate. This layering technique is what transforms the recipe from a chocolate-peanut brownie into a brownie with a peanut butter cup surprise, and that distinction makes all the difference.
Customizing Without Losing the Magic
The structure of this recipe is forgiving enough to accept substitutions if you're adventurous. I've swapped in white chocolate chips alongside the semi-sweet ones, tried peanut butter cups with caramel filling, and once experimented with crushed candy bar pieces instead of whole cups. The core technique remains unchanged—the batter thickness, the baking time, the cooling process—so you can play with the fillings without worrying you're breaking something fundamental about the recipe.
Serving and Storage Strategies
These brownies keep well for three or four days in an airtight container at room temperature, and something magical happens as they age slightly—the fudginess intensifies and flavors deepen. Warming them in a low oven before serving brings back the chocolate warmth, and a vanilla ice cream scoop on top turns them into a dessert that makes people pause mid-conversation. If you're transporting them anywhere, the parchment paper makes it easy to move them carefully without damage.
- Serve them at room temperature for the most balanced flavor, or gently warmed if you want maximum fudginess.
- A thin drizzle of melted chocolate or peanut butter across the cooled brownies adds visual appeal and tastes indulgent.
- These freeze beautifully for up to two months, so you can bake them ahead and slice them as needed.
 Save
Save These brownies have become my go-to when I need something that looks like I've spent hours perfecting my baking skills but actually takes less than an hour from start to finish. That's the kind of recipe worth keeping close.
Kitchen Guide
- → What kind of chocolate works best in these brownies?
Semi-sweet chocolate chips provide a balanced sweetness and melt smoothly, enhancing the brownie’s fudgy texture.
- → Can I substitute the peanut butter cups with another filling?
Yes, caramel candies or chocolate hazelnut spread make great alternatives that add unique flavors and textures.
- → How do I know when the brownies are fully baked?
Insert a toothpick in the center; it should come out with a few moist crumbs but not wet batter for the perfect fudgy finish.
- → Is it necessary to line the pan with parchment paper?
Using parchment helps with easy removal and clean edges, preventing brownies from sticking to the pan.
- → Can these brownies be stored after baking?
Yes, store them in an airtight container at room temperature for up to three days to maintain freshness.
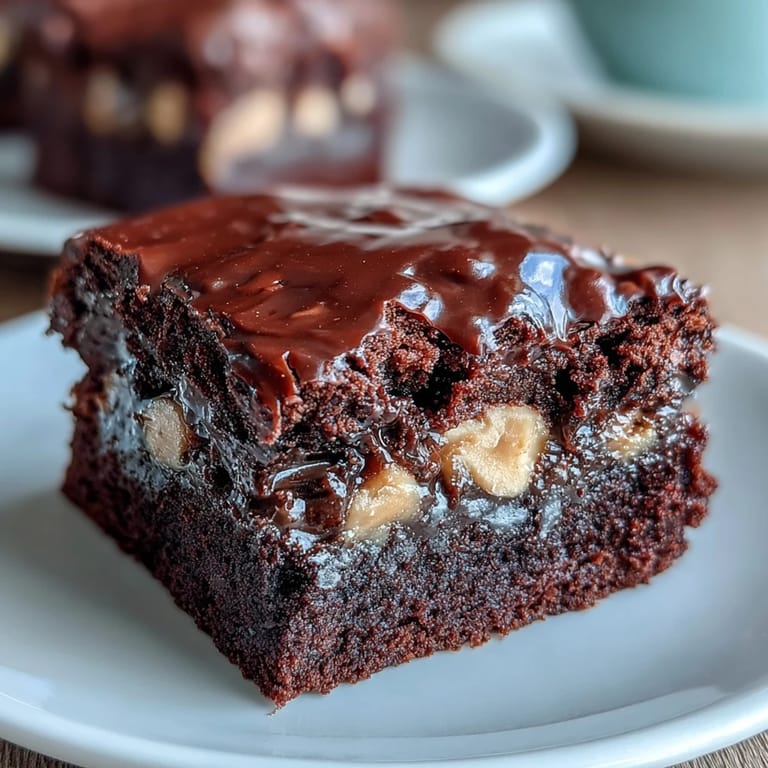
- → What is the texture of these brownies once cooled?
They have a dense, fudgy texture with pockets of melted peanut butter cups adding softness and richness.