 Save
Save There's something almost magical about the moment when you're standing in your kitchen at 10 PM, craving something sweet but convinced you have nothing worth making. That's when the mug cake saves you—five minutes and a handful of pantry staples transform into warm, fudgy indulgence. I discovered this Oreo version by accident, honestly, when my roommate dared me to make dessert in a coffee mug during a late-night study session. It worked so ridiculously well that I've been making it ever since, sometimes in secret so I don't have to share.
My friend Sarah came over stressed about an exam, and I made her one of these while she was venting. Watching her face light up when she took that first bite—chocolate melting on her tongue, crumbs from crushed Oreos still visible in the cake—reminded me that sometimes the simplest gestures mean the most. She's asked me to make it every time she visits since.
Ingredients
- 4 Oreo cookies: These form the base of your cake and do most of the heavy lifting flavor-wise; I always use regular Oreos rather than fancy varieties because the classic ones just taste better when baked.
- 3 tablespoons milk: This hydrates the cookie crumbs and creates the paste that binds everything together; use whatever milk you have on hand.
- 2 tablespoons all-purpose flour: Just enough to give the cake structure without making it dense or cakey in the bad way.
- 1 tablespoon granulated sugar (optional): Skip this if you want to rely entirely on the Oreos' sweetness, which I usually do.
- 1/4 teaspoon baking powder: This is the tiny ingredient that makes the biggest difference, giving you lift and a tender crumb.
- 1 small egg: The binder and moisture provider; don't skip or substitute this one.
- 1/2 teaspoon vanilla extract (optional): A whisper of vanilla deepens the chocolate flavor in a way your taste buds will notice even if your brain doesn't realize what's happening.
Tired of Takeout? 🥡
Get 10 meals you can make faster than delivery arrives. Seriously.
One email. No spam. Unsubscribe anytime.
Instructions
- Crush those cookies:
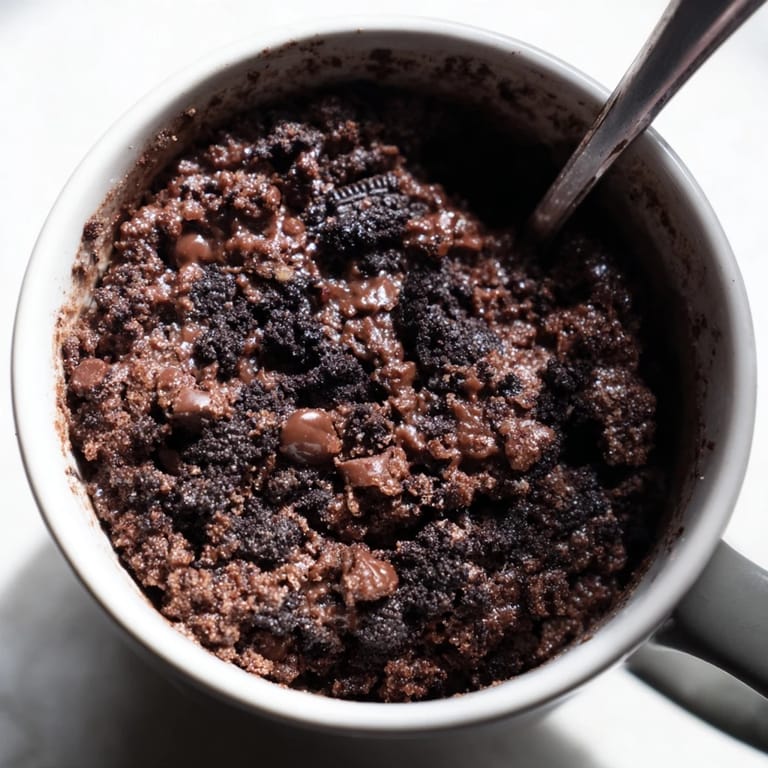
- Place your Oreos in the microwave-safe mug and smash them with a fork until they look like dark sand; this only takes about 30 seconds of firm pressure. Don't worry about getting them perfectly uniform—some texture in there is what makes it special.
- Create your base:
- Pour in the milk and stir until the cookie crumbs soak it up and turn into a thick, almost fudgy paste. This is when your kitchen starts smelling incredible.
- Build the batter:
- Sprinkle in the flour, sugar if you're using it, and baking powder, then mix until you don't see any dry streaks. The batter will look thick and promise-filled.
- Add the magic:
- Crack in your egg and the vanilla if you have it, then stir until everything is smooth and uniform in color. This is your final batter check point—it should look like soft chocolate mousse.
- The moment of truth:
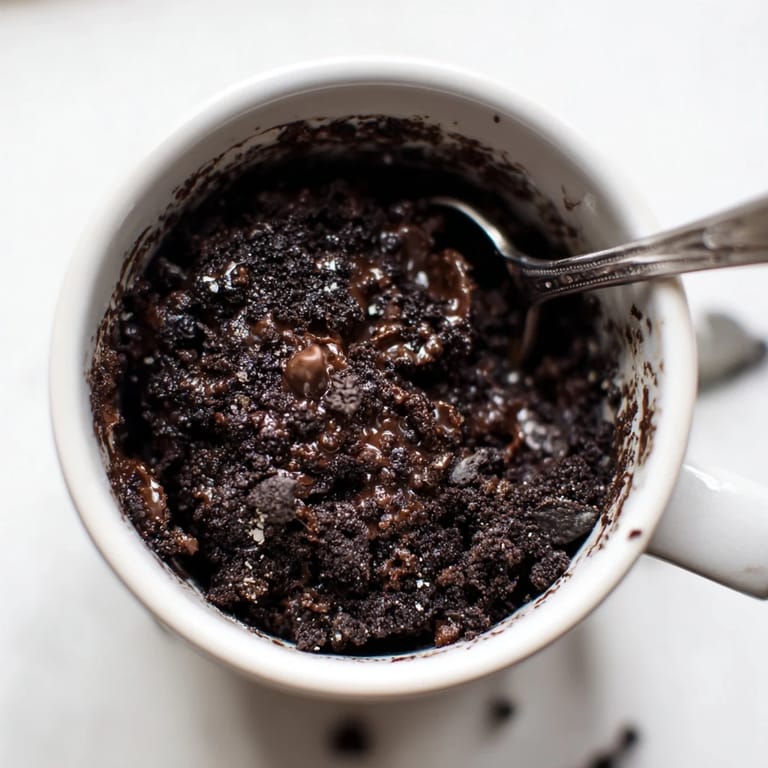
- Microwave on high for 1 minute and 30 seconds, then peek inside; the cake should be set on top but still have a slight jiggle in the center. If it looks too liquid, give it another 10 to 20 seconds, but don't overdo it or you'll lose that gooey magic.
- Rest and enjoy:
- Let it cool for just 1 to 2 minutes so you don't burn your mouth, then dig in directly from the mug with a spoon.
 Save
Save One morning I made this for my eight-year-old nephew, and he sat quietly eating it, no rushing, no talking—just fully present with each bite. That's when I realized this isn't just a quick dessert; it's a moment of comfort wrapped in chocolate and Oreo crumbs.
Why Microwave Cakes Actually Work
A lot of people dismiss microwave cakes as inferior, but they're missing the science happening inside that machine. The intense, direct heat actually gelatinizes the flour differently than an oven does, creating a more tender, almost custard-like center that's genuinely hard to replicate in a traditional oven. Plus, the short cooking time means the edges don't have time to dry out like they might in a 20-minute bake. The mug itself becomes your ally, concentrating steam and heat to create this perfectly moist cake that tastes indulgent in the best possible way.
Playing with Toppings and Variations
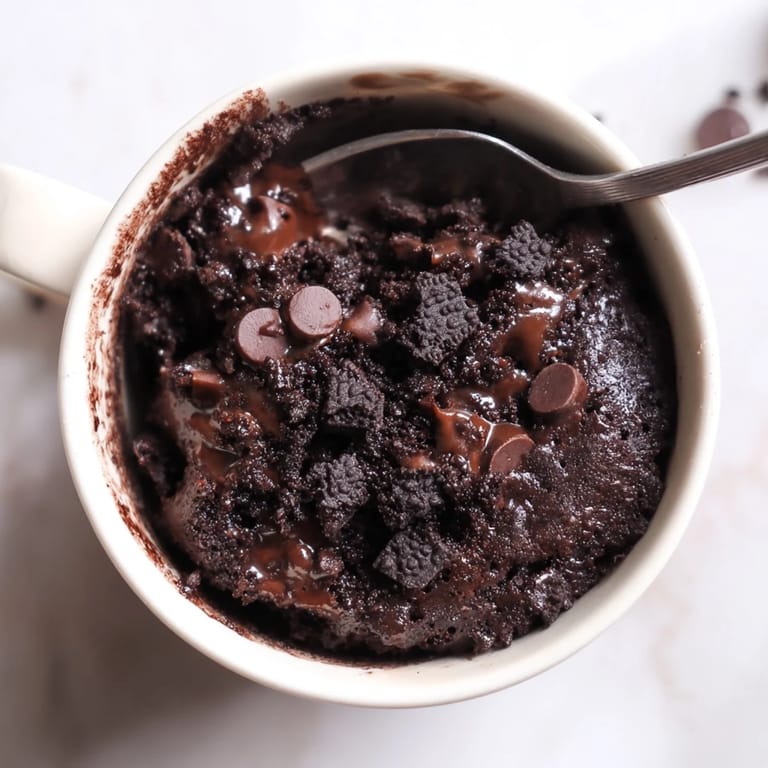
The beauty of this recipe is that it's a blank canvas for whatever you're craving in that exact moment. I've had it plain, which highlights how good the basic formula is, and I've piled on whipped cream, sprinkled chocolate chips on top right after cooking so they melt slightly, and scooped vanilla ice cream onto a still-warm cake and watched it melt into the crevices. One night I drizzled a tiny bit of caramel on top, and another time I crushed up extra Oreos and mixed them into the whipped cream topping. The recipe is so forgiving that you really can't mess it up.
The Quiet Joy of Simple Timing
What I love most about this recipe is that it requires almost no planning but feels like a treat. There's no shopping trip needed, no preheat wait, no cleanup that makes you regret your choices. It's the kind of dessert that teaches you that good things don't always require elaborate efforts or lots of time. You can pull this together in less time than it takes to get delivery, and somehow that makes it taste even better.
- If your microwave runs hot, start with 1 minute 20 seconds instead and adjust from there.
- Store unused Oreos in an airtight container, though honestly they won't last long once you realize how easy this is.
- This works just as well with other sandwich cookies if you're feeling adventurous, but Oreos are the classic for a reason.
 Save
Save This recipe proves that sometimes the best desserts are the ones you make without overthinking it, the ones that taste like comfort and quick decisions. I hope it brings you the same unexpected joy it's brought to my kitchen, one five-minute mug at a time.
Kitchen Guide
- → Can I use other cookies besides Oreos?
Yes, similar chocolate sandwich cookies can work, but the flavor and texture may vary.
- → Is the cooking time the same for all microwaves?
Microwave power varies; start with 1 minute 30 seconds and add extra time if needed.
- → Can I make it dairy-free?
Use a plant-based milk alternative to replace regular milk for a dairy-free version.
- → What is the best way to check doneness?
The mug cake should be set but still moist in the center; avoid overcooking to keep softness.
- → Can I add toppings to enhance flavor?
Whipped cream, chocolate chips, or ice cream complement the dessert beautifully.
- → Is it possible to prepare this without an egg?
The egg helps bind the dessert; you may try substitutes like flaxseed mixture, though texture changes.