 Save
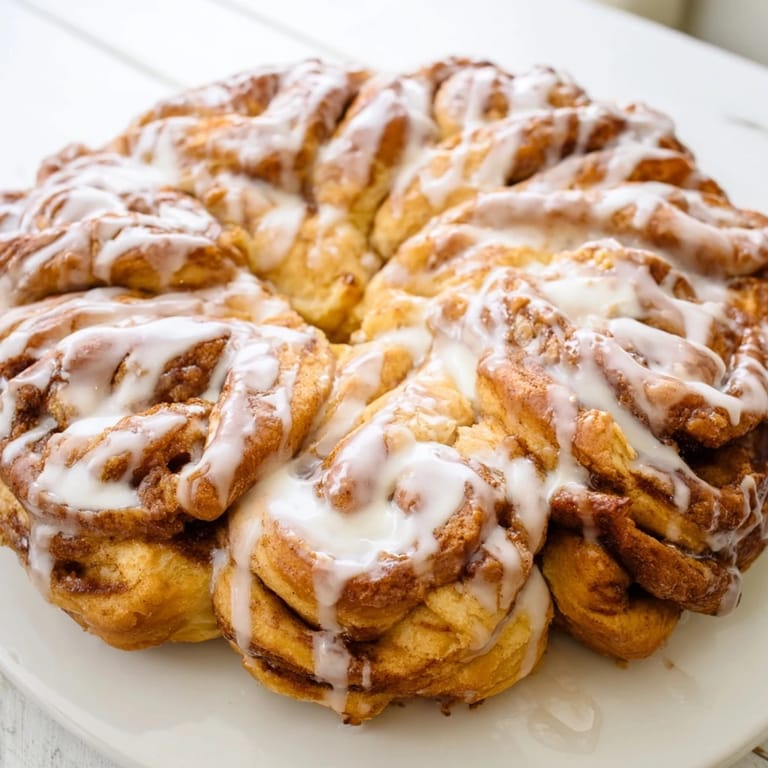
Save There's something magical about pulling apart warm pastry with your bare hands while it's still steaming from the oven. I discovered this cinnamon roll snowflake while snowed in at a friend's cabin, bored and looking through her grandmother's old recipe box. The idea of baking something festive without leaving the kitchen felt like a small rebellion against winter itself. When I finally pulled those twisted strips apart and watched the cinnamon swirls come loose, I understood why she'd kept that recipe all these years. It wasn't just about the taste—it was the theater of it all.
I brought this to a holiday potluck skeptical that anyone would actually care about a cinnamon roll, even one shaped like a snowflake. But I watched people circle back to it three times, pulling off strips and dunking them in their coffee. My mom stood there holding a piece and just shook her head, saying she'd never seen a breakfast item steal the show like that before.
Ingredients
- All-purpose flour (3 1/4 cups): This is your foundation, and measuring by weight instead of volume makes all the difference in consistency—grab a scale if you have one.
- Granulated sugar (1/4 cup): This feeds the yeast and wakes it up, so don't skip this step even though it seems small.
- Active dry yeast (2 1/4 tsp): Check the expiration date because dead yeast is the fastest way to end up with a brick instead of a snowflake.
- Salt (1/2 tsp): Enhances flavor and keeps the dough from puffing out of control in the oven.
- Warm milk (3/4 cup): This should feel like a warm bath on your inner wrist—too hot and you kill the yeast, too cool and nothing happens.
- Unsalted butter, melted (1/4 cup): Makes the dough tender; use real butter because this is where you taste the difference.
- Egg (1 large): Brings richness and helps the dough brown beautifully, so room temperature matters.
- Light brown sugar (1/2 cup packed): The molasses in brown sugar makes the filling taste deeper and richer than white sugar ever could.
- Ground cinnamon (2 tsp): Buy it fresh if you can—old cinnamon is dusty and flat-tasting.
- Unsalted butter, softened (1/4 cup): This needs to be soft enough to spread without tearing the dough, so let it sit out while the dough rises.
- Powdered sugar (1 cup): Sifted if you have the patience, because lumpy icing feels homemade in the wrong way.
- Milk (2–3 tbsp): Use whole milk for silkier icing, and add it slowly so you don't end up with soup.
- Vanilla extract (1/2 tsp): The kind that actually says vanilla on the bottle—not imitation, which tastes like plastic.
Tired of Takeout? 🥡
Get 10 meals you can make faster than delivery arrives. Seriously.
One email. No spam. Unsubscribe anytime.
Instructions
- Start with the yeast bloom:
- Warm milk, sugar, and yeast should sit together until foamy—this takes 5 to 10 minutes and tells you the yeast is alive and ready to work. If nothing happens, your yeast is dead and it's time to start over.
- Build the dough:
- After the bloom, add butter, egg, and salt, then gradually mix in flour until everything comes together into a shaggy mess. Don't dump all the flour at once or you'll end up fighting the mixer.
- Knead until silky:
- Work the dough on a clean surface for 5 to 7 minutes—your hands will tell you when it's done because it stops sticking and feels elastic and alive. This is not optional; short-changing the kneading shows up in the final texture.
- First rise:
- Oil a bowl, nestle the dough inside, cover with a towel, and find somewhere warm (an oven with just the light on works beautifully). You're waiting for it to double, which usually takes an hour if your kitchen isn't frigid.
- Layer the filling:
- Punch down the dough and divide it into three equal pieces—use a bench scraper or your eye to eyeball it. Roll each into a 12-inch circle on a clean surface.
- Assemble the stack:
- Place the first circle on parchment, spread half the softened butter, sprinkle half the cinnamon sugar, then repeat with the second circle and remaining butter and cinnamon, finishing with the bare dough circle on top. The assembly is just spreading and sprinkling—there's no trick here.
- Cut the snowflake:
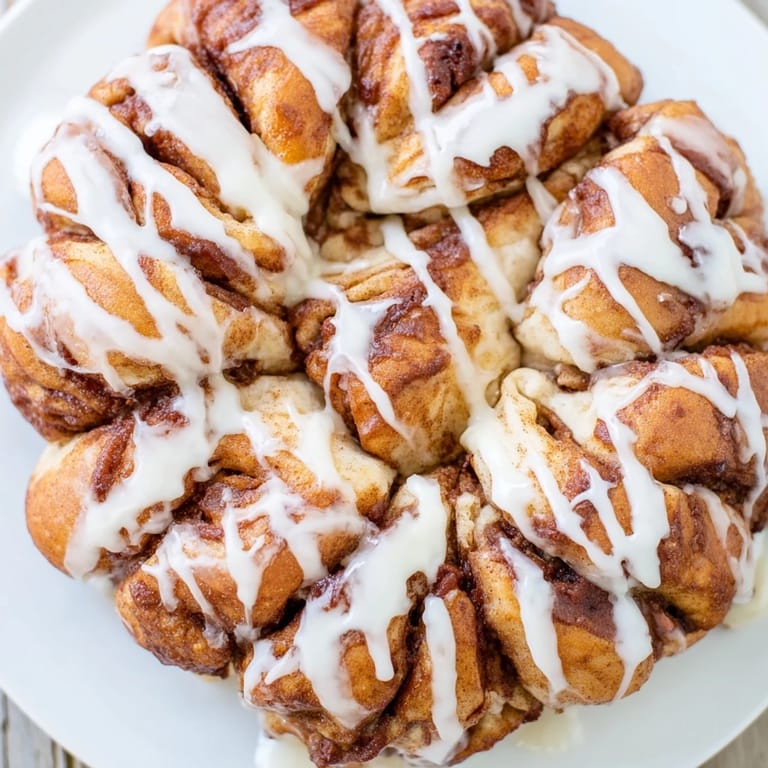
- Set a small glass in the center (it acts as your anchor) and use a sharp knife to cut 16 strips radiating outward like spokes. Steady hands help, but shaky cuts still look beautiful once they twist.
- Twist into shape:
- Take two adjacent strips, twist them twice away from each other, and pinch the ends together—they'll hold because the dough is sticky. Repeat with every pair around the whole thing, then remove the glass and admire what you've made.
- Second rise:
- Cover with a towel and let it sit for 15 minutes while the oven preheats to 350°F. This short rise is enough to puff everything slightly without overproofing.
- Bake until golden:
- The snowflake should take 22 to 25 minutes—start checking at 20 because ovens vary wildly, and you want deep gold, not burnt edges. The bottom will be firm and the cinnamon filling might peek through, and that's exactly right.
- Cool, glaze, and serve:
- Let it sit 10 minutes so people don't burn their mouths, then whisk the icing and drizzle it generously while everything is still warm. Serve it family-style and watch people pull strips off and eat with their hands like it's the most natural thing in the world.
 Save
Save My neighbor came over the morning I made this and stood in my kitchen for twenty minutes just eating pieces and not saying much. Later she asked if I'd teach her, and now it's become our winter tradition—she brings coffee, I provide the dough, and we shape snowflakes while gossiping about the neighborhood. That's when I realized this recipe was never really about impressing people; it was about giving them permission to be a little silly and indulgent on a cold morning.
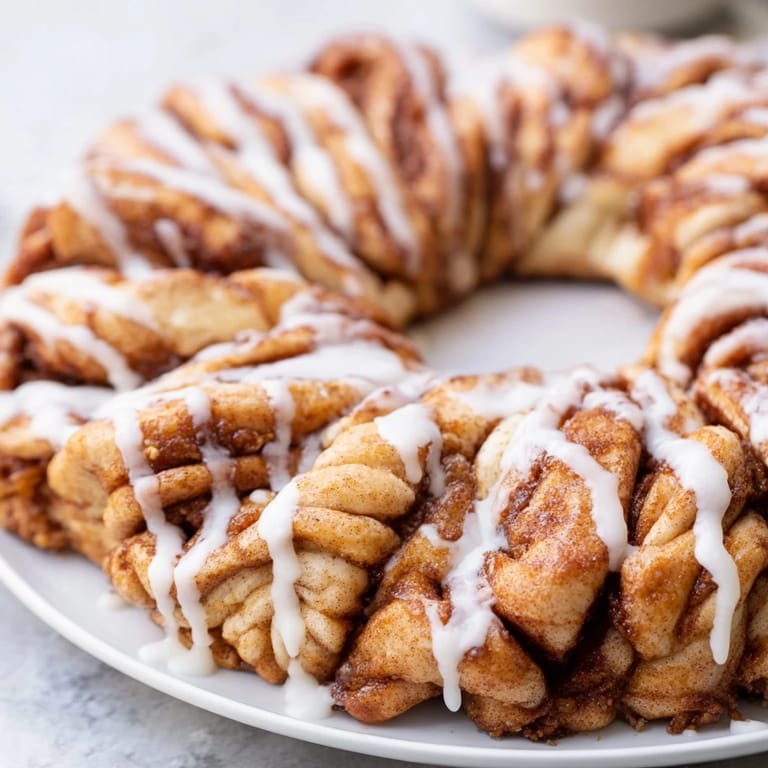
Why This Shape Works
The snowflake shape isn't just decorative—it's brilliant because each twisted pair separates naturally, so serving it pull-apart style means everyone gets their own piece without you needing to slice into the stack and destroy the presentation. The twists also create more surface area for the icing to cling to, so every bite is generously glazed. Plus, there's something satisfying about eating something that's literally decorated your plate while you were just handling it.
Timing and Temperature Tricks
The difference between a dense roll and a cloud-light one often comes down to temperature—warm milk should feel like a bath on your wrist, not hot enough to kill the yeast. Similarly, room-temperature eggs and softened butter incorporate more smoothly than cold ones, so pull them out before you start mixing. If your kitchen runs cold, activate the yeast in a warmed bowl, and let the dough rise in an oven with just the light on, which creates the perfect microclimate without actual heat.
Customization and Variations
The base recipe is so forgiving that you can play with it endlessly without breaking anything. Some people swear by adding a splash of heavy cream to half the milk for a richer dough, while others press toasted chopped pecans or raisins into the cinnamon sugar layer for texture and depth. The icing stays the same, but vanilla can be swapped for almond extract, or you can add a tiny pinch of salt to the glaze to make the sweetness more interesting.
- Maple extract in the icing tastes like fall even in the middle of winter.
- A light brush of egg wash before the second rise makes the finished snowflake glossier and more dramatic.
- If you make this ahead, bake it, cool it completely, and freeze it—just re-warm in a low oven before drizzling the icing.
 Save
Save This snowflake has become the thing I make when someone needs a little softness in their morning, which seems to be all the time. It's breakfast and dessert at once, and it tastes like winter feels when everything is quiet and warm.
Kitchen Guide
- → How do you achieve the snowflake shape?
Roll the dough into three circles stacked with cinnamon butter, cut into 16 strips around a center glass, then twist pairs of strips outward twice and pinch ends to form points.
- → Can I make the dough richer?
Yes, replace half the milk with heavy cream to add extra richness to the dough's texture and flavor.
- → What’s the best way to know when it’s baked?
Bake until the dough is golden brown and cooked through, usually around 22–25 minutes. A light tap should sound hollow.
- → Can additional fillings be added?
Yes, chopped toasted pecans or raisins can be included for added texture and flavor.
- → What tools are needed for shaping?
A small glass to define the center, a sharp knife for cutting strips, and optionally a pastry brush for applying butter.