 Save
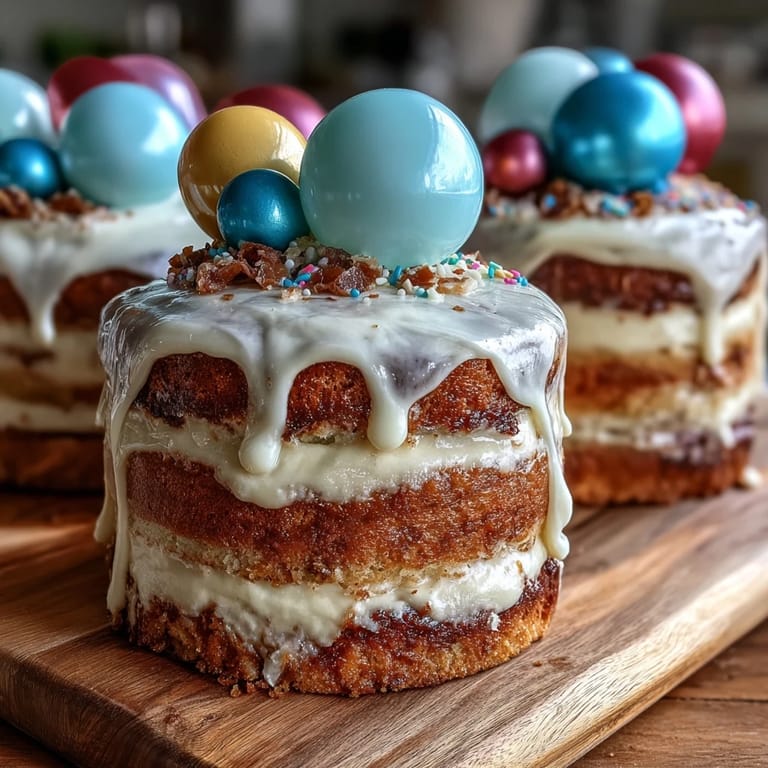
Save My friend texted me at 11 PM the night before her daughter's graduation: "Can you make the cake?" I laughed because I'd already started prepping, sensing she'd need one. There's something about two-tier cakes that makes people feel celebrated, like you've given them a stage to stand on. This vanilla sponge with buttercream reminds me of that particular kind of nervous excitement—the kind where you're baking for someone's big moment and you want everything to turn out just right.
I've made this cake exactly four times now, and the memory that sticks with me is my nephew's face when he saw it for the first time. His eyes went wide, and he said, "You made this?" like it had magically appeared from a bakery. That's when I realized the two-tier thing really does feel like a gift in itself.
Ingredients
- All-purpose flour (4 1/2 cups): Make sure it's fresh and airy; old flour can make your cake dense, so I started using a kitchen scale instead of scooping directly from the bag.
- Baking powder (3 1/2 tsp): This is your lift, your confidence booster, so don't skimp or substitute with baking soda unless you love dense cake.
- Salt (1/2 tsp): It sounds small, but it's the difference between sweet cake and "what's missing" cake.
- Granulated sugar (2 1/2 cups): The creaminess comes from how long you beat this with the butter, so don't rush that step.
- Unsalted butter (1 1/2 cups): Room temperature is non-negotiable here; cold butter won't incorporate properly and you'll end up with a grainy batter.
- Large eggs (8 eggs): Room temperature eggs mix into the batter like they belong there, not like they're being forced in against their will.
- Pure vanilla extract (2 tbsp for cake): I learned this the hard way: imitation extract tastes noticeably different when you're making something this simple, so splurge a little.
- Whole milk (2 cups): Room temperature milk keeps the batter from shocking the hot butter mixture, and it helps the cake stay tender.
- Unsalted butter for frosting (2 cups): Again, room temperature—this frosting is all about emulsion, and cold butter ruins that.
- Powdered sugar (8 cups): Sift it before measuring or you'll end up with butter-sugar concrete; I learned this while standing in my kitchen at midnight covered in flour.
- Milk or heavy cream for frosting (1/2 cup): Milk makes it lighter and fluffier; heavy cream makes it richer and more stable if you're working slowly.
- Vanilla extract for frosting (2 tbsp): Same rule as before: real vanilla tastes like a decision, not an accident.
- Gel food coloring (optional): If you use it, start with a tiny dab because gel is aggressive and you can always add more, but you can't take it out.
- Balloon cake toppers: These make or break the graduation vibe, so pick ones that match the celebration mood.
Tired of Takeout? 🥡
Get 10 meals you can make faster than delivery arrives. Seriously.
One email. No spam. Unsubscribe anytime.
Instructions
- Get your oven and pans ready:
- Preheat to 350°F and grease your pans with butter or cooking spray, then line the bottoms with parchment paper so the cakes don't stick. Cold pans resist heat, so let them sit at room temperature while your oven warms up.
- Mix your dry ingredients:
- Whisk flour, baking powder, and salt together in a bowl—this distributes the leavening evenly so you don't end up with random pockets of density. I learned to do this slowly to avoid flour clouds everywhere.
- Cream butter and sugar until fluffy:
- Beat them together for a full 3 to 5 minutes until the mixture looks pale and airy like mousse, not dense and yellow. This step is doing the heavy lifting for your cake's texture, so don't cut corners.
- Add eggs one at a time:
- Beat well after each egg so it fully incorporates before the next one arrives; this creates a stable emulsion that keeps your cake tender. If the mixture looks curdled, don't panic—it usually comes back together once you add the dry ingredients.
- Mix in vanilla:
- Just a quick beat to combine it evenly throughout the butter mixture.
- Alternate flour and milk in three additions:
- Start with flour, then milk, then flour again, ending with flour—this prevents overmixing and keeps gluten development minimal. Mix only until you don't see dry streaks anymore; overmixing is the enemy of tenderness here.
- Divide batter between your pans:
- Split it so both the 8-inch and 6-inch pans get even amounts; I use a kitchen scale to be absolutely sure. Tap the pans gently on the counter to release trapped air bubbles that could create holes.
- Bake with patience:
- 8-inch cakes take 35 to 40 minutes, 6-inch cakes take 25 to 30 minutes—a toothpick inserted in the center should come out clean with just a few crumbs. Start checking at the lower end of the time range so you don't overbake.
- Cool in pans first, then on racks:
- Let them sit in the pans for exactly 10 minutes so they firm up enough to release cleanly, then turn them out onto wire racks to cool completely. This step takes patience—don't try to frost warm cake or your frosting will melt into sad puddles.
- Make the buttercream frosting:
- Beat softened butter until it's light and creamy, then gradually add powdered sugar a cup at a time while beating so you don't create lumps. Add vanilla, salt, and milk or cream one tablespoon at a time until it's smooth and spreadable—you want it thick enough to hold peaks but soft enough to spread easily.
- Tint your frosting if using color:
- Start with a toothpick dab of gel food coloring and beat it in; add more if you need deeper color. It's much easier to go darker than to lighten it back up.
- Level your cake tops:
- If the tops domed during baking, use a serrated knife or cake leveler to slice them flat so stacking is stable. These little flat discs don't go to waste—they're perfect for sneaking into your mouth while you work.
- Build your bottom tier:
- Place one 8-inch layer on your cake board, spread a layer of buttercream on top, then stack the second 8-inch layer on top. Do the same with your 6-inch cakes so you have two complete tiers.
- Apply a crumb coat:
- Spread a thin layer of frosting over each entire cake to seal in crumbs, then chill for 20 minutes so the frosting hardens. This step feels tedious but it means your final frosting coat looks pristine instead of studded with cake crumbs.
- Frost smoothly:
- Use a frosting spatula or bench scraper to apply your final frosting layer to both tiers, making it as smooth as you want it—perfectly smooth, rustic texture, or somewhere in between. A cake turntable makes this easier if you have one, but a lazy Susan works in a pinch.
- Stack your tiers carefully:
- Center the 6-inch cake on top of the 8-inch cake, using dowels or straws inserted vertically through the bottom tier to support the weight. The dowels keep the top tier from slowly sinking into the bottom one, which looks droopy and defeats the whole celebration vibe.
- Add your balloon toppers:
- Arrange balloon toppers across the top and around the cake, then add edible confetti or sprinkles if you want extra pizzazz. This is the moment where everything transforms into something celebration-worthy.
 Save
Save What gets me about this cake is that it's honestly just vanilla and butter—nothing fancy—but the two tiers make it feel important. After the ceremony, everyone gathers around it like it's not just dessert, it's proof that something major happened.
Make-Ahead Magic
I've started baking the cake layers the day before, wrapping them individually in plastic wrap and storing them at room temperature. The frosting also holds beautifully in an airtight container for up to three days, so you can actually assemble everything the morning of without losing your mind at midnight. This cake doesn't need fresh-off-the-cooling-rack perfection to taste amazing.
Flavor Variations That Work
The base recipe is vanilla, but that's intentional—it's a blank canvas that celebrates whoever it's honoring. A friend once added almond extract to her daughter's cake because it was her favorite, and suddenly the whole thing tasted like a memory. You could also add a tablespoon of lemon zest to the batter for brightness, or swap the milk for buttermilk for tanginess.
Decoration Strategies Beyond Balloons
Balloons are playful and fun, but you can make this cake entirely your own with the right finishing touches. Consider what the graduate loves and let that guide your choices. Here are some ideas that have worked:
- Use the school colors in the frosting itself or in sprinkles around the base tier.
- Add fresh flowers between the tiers for elegance, or chocolate shavings for richness.
- Skip the balloons and do a simple cake-board border of edible confetti that matches the celebration's color scheme.
 Save
Save This cake has become my go-to celebration dessert because it looks impressive but feels manageable, and it tastes like genuine vanilla joy. Make it for someone you're proud of and watch how a simple two-tier cake becomes the sweetest part of their big day.
Kitchen Guide
- → What type of flour is best for the sponge layers?
All-purpose flour provides the ideal texture and structure for the vanilla sponge layers, ensuring a tender yet sturdy cake.
- → How can I prevent the layers from collapsing when stacked?
Use cake dowels or straws for support and chill the layers after applying a crumb coat before stacking to maintain stability.
- → Can I customize the colors of the buttercream frosting?
Yes, gel food coloring allows you to tint the buttercream in your preferred shades, perfect for coordinating with celebration themes.
- → What is the best method to ensure even baking of the different sized layers?
Bake the 8-inch pans for 35–40 minutes and the 6-inch pans for 25–30 minutes, testing doneness with a toothpick.
- → Are the balloon toppers safe to use on cakes?
Balloon toppers made with food-safe sticks and mini balloons designed for cake decoration are safe and add a playful appearance.
- → How long does the cake stay fresh once assembled?
Stored in a cool environment, the cake remains fresh for 2-3 days, especially if covered properly to retain moisture.