 Save
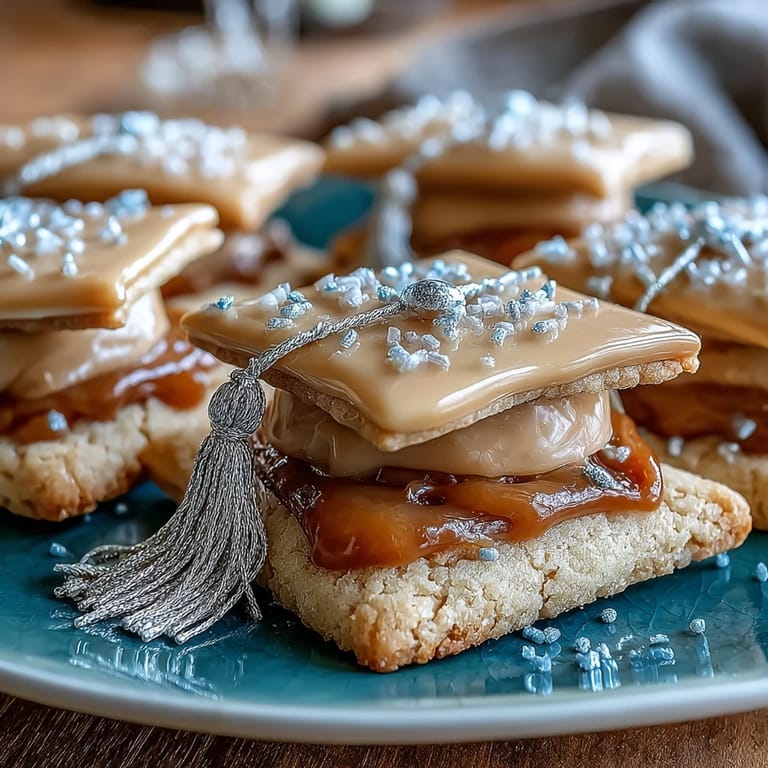
Save The scent of warm vanilla and melting butter always gets me the second I pull graduation cookies from the oven. Last spring, I found myself meticulously piping golden tassels onto sugar cookies shaped like diplomas and caps, each one destined for a plate at a cousin’s graduation party. The kitchen pulsed with gentle excitement—radio humming in the background, icing bags clenched in determined hands. It’s surprising how something as simple as decorating cookies can make an ordinary Wednesday feel worthy of celebration. These cookies are more than a treat; they’re a way to say “you did it” with a dusting of gold and a lot of love.
One evening, we set up a cookie-decorating station for my little sister’s graduation—bowls of colored icing, luster dust glimmering in sunlight, kids poking at piping bags. By the end, gold fingertips and accidental smears were everywhere, but so were the laughs. Each cookie was its own imperfect masterpiece, and by the time we were done, even the quiet uncle grabbed a cap and grinned. It’s the mess and the laughter I remember more than the perfectly painted scrolls.
Ingredients
- All-purpose flour: Measure carefully and level off for cookies that hold their shape, never over-packed.
- Unsalted butter: Letting the butter come fully to room temperature makes all the difference in that irresistible creamy crumb.
- Granulated sugar: Fine sugar creates a delicate sweetness—mix it until really fluffy for the softest results.
- Large egg: A fresh egg binds the dough just enough for clean-cut shapes with no spread.
- Pure vanilla extract: Use genuine vanilla for a fragrant, nostalgic flavor that anchors the sweetness.
- Almond extract (optional): Adds a nutty depth, though lemon extract also works for a fresh twist.
- Salt: Just a pinch wakes up all the flavors—I learned not to skip this.
- Powdered sugar: Always sifted for silky smooth royal icing without any lumps or clumps.
- Egg whites / meringue powder: Either works—what matters most is avoiding even a trace of grease for glossy peaks.
- Cream of tartar: Balances texture and keeps the icing perfectly stable while piping.
- Black gel food coloring: A little goes a long way—don’t be tempted to squeeze in too much.
- Gold edible luster dust & clear alcohol (or lemon extract): The finishing magic for accents; use a light hand with your brush for shimmer, not streaks.
Tired of Takeout? 🥡
Get 10 meals you can make faster than delivery arrives. Seriously.
One email. No spam. Unsubscribe anytime.
Instructions
- Cream the Butter & Sugar:
- Beat softened butter and sugar together until pale, fluffy clouds form and the mixture looks whipped and light.
- Add Egg & Flavors:
- Mix in the egg, vanilla, and almond extract; notice how the aroma shifts from sweet to almost floral as you go.
- Form the Dough:
- Tip in flour and salt gradually—pause when the dough just holds together, avoiding overmixing for tender cookies.
- Chill the Dough:
- Flatten into discs, wrap tightly, and chill for at least 45 minutes so your shapes will come out crisp and defined.
- Shape the Cookies:
- Roll out dough on a lightly floured countertop to 1/4-inch thickness, then cut out diploma and cap shapes, gently transferring to baking sheets.
- Bake to Perfection:
- Bake until just the edges turn golden—don’t wait for color all over; pale means moist and perfect inside.
- Mix the Royal Icing:
- Beat egg whites (or meringue powder and water) until frothy, then gradually add powdered sugar and cream of tartar, mixing until stiff, shiny peaks stand tall.
- Tint and Divide:
- Split icing, coloring some black for caps and leaving some bright white; reserve another portion for gold accents.
- Decorate the Cookies:
- Pipe outlines first, let them set, then flood and finish details; have fun with tassels, ribbons, and scrolls—no pressure for perfection.
- Add Golden Accents:
- Mix gold luster dust with a dash of clear alcohol, then brush shimmering highlights onto the set icing, being careful not to overdo it.
 Save
Save 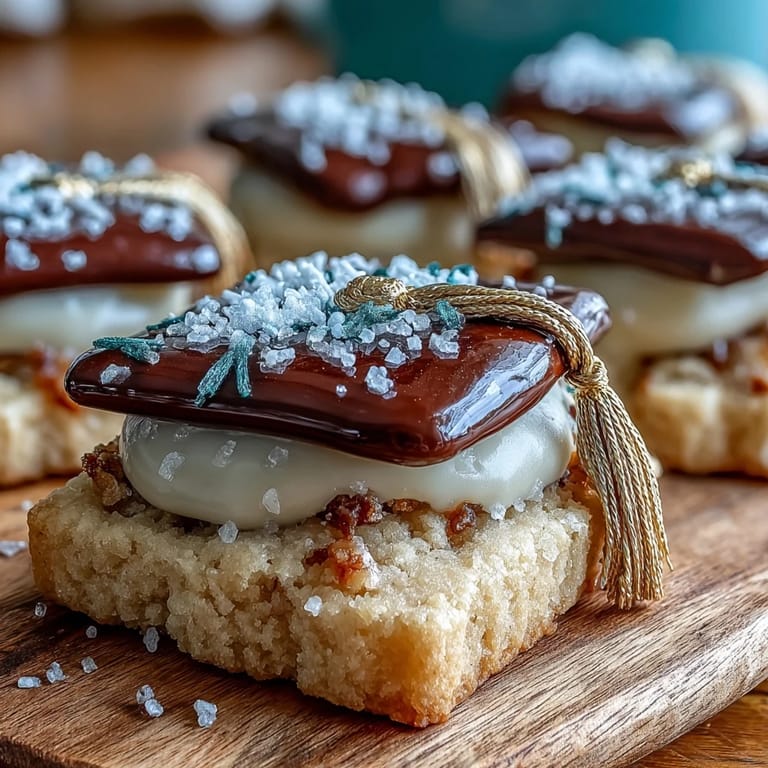 Save
Save When my cousin arrived, the cookies were lined up like a golden, edible parade. She smiled so big when she saw her name painted in delicate script on a diploma cookie, and for a moment, all the nerves and ceremony melted away over shared bites of sugar and butter.
Decorating Without Stress
I used to tense up about precision but learned that a relaxed grip yields steadier icing lines. Paint those tassels even if they’re a bit lopsided—everyone will see the heart behind them more than any flaw.
Swapping Flavors and Hues
Don’t be afraid to play with extracts or tint the icing to match school colors—it’s amazing how a hint of lemon zest or a royal blue ribbon transforms the treat. Each tweak becomes a signature touch that’s all your own.
Sharing and Storing Successfully
These cookies stack neatly between sheets of wax paper, making them perfect for sharing at parties or packaging up for friends and classmates. Just be sure to let them dry fully before boxing, and watch faces light up when you open the lid.
- Airtight containers keep them fresh for days.
- Use a soft brush to apply gold; hard bristles can dent the icing.
- Label containers if gifting several varieties.
 Save
Save  Save
Save Cookie decorating turns ordinary accomplishments into sparkling celebrations—gold smudges and all. Here’s to every sweet milestone, and those little edible diplomas that mark the occasion.
Kitchen Guide
- → How do I stop the cookies from spreading during baking?
Chill the dough discs and cut shapes well before baking, avoid over-creaming the butter and sugar, measure flour accurately, and bake on a lined sheet at 350°F until edges are just golden.
- → What are the best royal icing consistencies for piping and flooding?
Use a stiffer icing for outlines and fine details so the lines hold shape; thin a separate portion with a few drops of water until it flows slowly and levels within 10–15 seconds for flooding.
- → How do I get vibrant gold accents without smudging the icing?
Allow flooded icing to set completely, then mix edible gold luster dust with a few drops of clear alcohol or lemon extract to form a paint and apply with a fine, food-safe brush for crisp metallic highlights.
- → Can I substitute egg whites in the royal icing?
Yes. Use meringue powder reconstituted per package instructions (the stated 4 tbsp meringue powder + 6 tbsp water approximates two egg whites) for a stable, safer alternative.
- → What storage and make-ahead tips work best?
Bake and decorate ahead: store completely dry cookies in an airtight container at room temperature up to one week. Separate layers with parchment to protect icing details.
- → How can I adapt the flavor or accommodate allergies?
Swap almond extract for lemon for brightness. For dairy-free or egg-free needs, use a vegan butter substitute and an egg replacer for the cookie base, and ensure decorations and luster dust are allergen-free labeled.