 Save
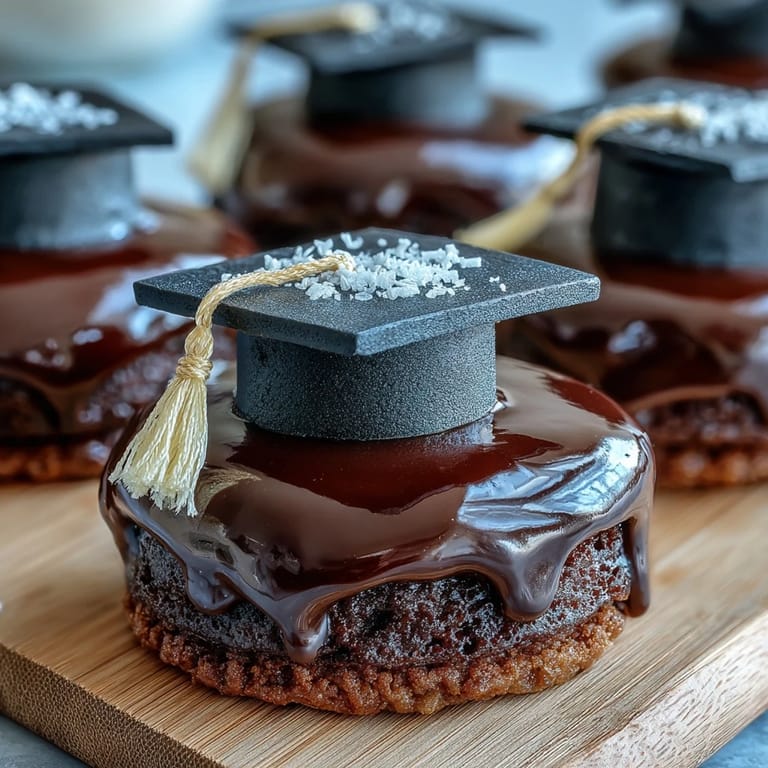
Save There's something truly special about celebrating academic milestones with homemade treats that carry both love and pride. These graduation cookies topped with elegant fondant mortarboards are more than just desserts—they're edible tokens of achievement, crafted to honor the hard work and dedication of your graduate. Whether you're planning a graduation party, creating gift boxes for classmates, or simply want to surprise your scholar with something sweet, these delightful sugar cookies offer the perfect combination of festive charm and delicious flavor.
Save The beauty of these graduation cookies lies in their versatility and approachability. The tender, buttery sugar cookie provides the perfect canvas for your fondant artistry, while the simple icing acts as both decoration and adhesive. Working with fondant might seem intimidating at first, but creating these miniature mortarboards is surprisingly straightforward—just squares, small cylinders, and delicate tassels that come together to form an iconic symbol of academic success. The result is a professional-looking treat that will impress guests and graduates alike.
Ingredients
Tired of Takeout? 🥡
Get 10 meals you can make faster than delivery arrives. Seriously.
One email. No spam. Unsubscribe anytime.
- For the Sugar Cookies: 2 1/2 cups (315 g) all-purpose flour, 1/2 teaspoon baking powder, 1/2 teaspoon salt, 1 cup (225 g) unsalted butter (softened), 1 cup (200 g) granulated sugar, 1 large egg, 2 teaspoons pure vanilla extract
- For the Fondant Mortarboard: 8 oz (225 g) black fondant, 1 oz (30 g) yellow fondant (for tassels), cornstarch (for dusting and rolling)
- For Decorating: 1 cup (120 g) powdered sugar, 1–2 tablespoons milk, 1/2 teaspoon vanilla extract
Instructions
- Step 1: Prepare for Baking
- Preheat oven to 350°F (175°C). Line two baking sheets with parchment paper.
- Step 2: Mix Dry Ingredients
- In a medium bowl, whisk together flour, baking powder, and salt.
- Step 3: Cream Butter and Sugar
- In a large bowl, cream butter and sugar until light and fluffy, about 2–3 minutes.
- Step 4: Add Wet Ingredients
- Beat in the egg and vanilla until combined.
- Step 5: Combine Dough
- Gradually add the dry ingredients to the wet, mixing just until incorporated.
- Step 6: Shape Cookies
- Roll dough out on a lightly floured surface to 1/4-inch thickness. Cut into 2 1/2-inch round or square shapes.
- Step 7: Bake
- Place cookies on prepared baking sheets. Bake for 10–12 minutes or until edges are just golden. Cool completely on a wire rack.
- Step 8: Create Mortarboard Pieces
- While cookies cool, roll black fondant to 1/8-inch thickness. Cut out 24 small squares (about 1 1/4-inch each) for mortarboard tops. Roll 24 small cylinders (about 1/2-inch long) for mortarboard bases.
- Step 9: Make Tassels
- Roll yellow fondant into thin ropes and cut into 1-inch pieces for tassels. Shape as desired.
- Step 10: Prepare Icing
- For icing, mix powdered sugar, milk, and vanilla until smooth.
- Step 11: Assemble Decorations
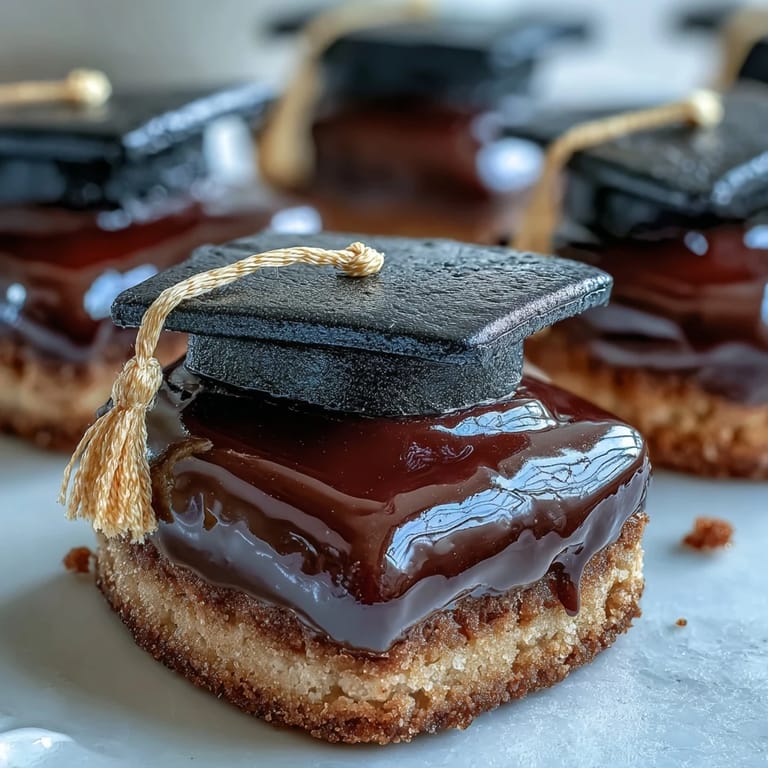
- Decorate each cooled cookie: Use icing to attach a fondant square in the center. Place a fondant cylinder under the square as the base. Use a dab of icing to attach a yellow tassel to one corner.
- Step 12: Set and Serve
- Let decorations set for 20–30 minutes before serving or packaging.
Zusatztipps für die Zubereitung
Working with fondant requires a light touch and proper preparation. Always dust your work surface with cornstarch rather than flour to prevent sticking and maintain the fondant's smooth texture. When rolling out the fondant, aim for consistent thickness to ensure uniform mortarboard pieces. If the fondant becomes too soft or sticky while working, let it rest for a few minutes or knead in a bit more cornstarch. For the cookie dough, avoid overmixing once you add the dry ingredients—this keeps your cookies tender rather than tough. Chilling the cut cookie shapes for 10–15 minutes before baking helps them hold their shape beautifully in the oven.
Varianten und Anpassungen
Personalize these graduation cookies to match specific school colors by using different fondant shades—try burgundy and gold, blue and white, or green and yellow combinations. For a time-saving approach, use store-bought sugar cookie dough and pre-colored fondant from craft stores. Create gluten-free versions by substituting with a quality gluten-free flour blend, or make them dairy-free using plant-based butter and non-dairy milk. You can also add flavor variations to the cookie base itself—try almond extract instead of vanilla, or add a teaspoon of lemon zest for a citrus twist. For extra detail, use edible markers to write graduation years or initials on the mortarboard tops.
Serviervorschläge
Present these graduation cookies on a tiered display stand at your celebration for maximum visual impact, or arrange them on a platter alongside other graduation-themed treats. Package individual cookies in clear cellophane bags tied with ribbon in school colors to create memorable party favors or gifts for graduates. Pair them with coffee, punch, or champagne at your graduation reception. Create a dessert table featuring these cookies as the centerpiece, surrounded by cupcakes, cake pops, and a graduation cake. For gift boxes, layer cookies between parchment paper sheets in decorative boxes, and include a congratulatory note for an extra personal touch.
 Save
Save These graduation cookies represent more than just a sweet treat—they're a celebration of perseverance, achievement, and new beginnings. As you craft each delicate mortarboard and place it atop its buttery cookie base, you're creating memories that will be cherished long after the last crumb is enjoyed. Whether your graduate is moving from kindergarten to first grade, high school to college, or college to career, these cookies offer a heartfelt way to mark the moment. Store any leftovers in an airtight container for up to 5 days, though we suspect they'll disappear much faster than that. Congratulations to your graduate, and happy baking!
Kitchen Guide
- → How do I achieve the perfect cookie texture?
Use softened unsalted butter and cream it well with sugar to create a light texture. Avoid overmixing once dry ingredients are added to keep cookies tender.
- → What is the best way to roll fondant for decorations?
Roll fondant on a surface dusted lightly with cornstarch to prevent sticking. Aim for an even 1/8-inch thickness for easy cutting and shaping.
- → Can I prepare the cookies ahead of time?
Yes, cookies can be baked and stored in an airtight container for up to 5 days. Decorate close to serving to maintain freshness.
- → How do I make the tassels on the mortarboard?
Roll thin ropes of yellow fondant and cut them into 1-inch pieces. Attach these to the fondant square using a small amount of icing.
- → Are there alternatives for dietary restrictions?
Substitute all-purpose flour with gluten-free flour, use dairy-free butter, or egg replacers as needed. Always ensure fondant ingredients are allergen-safe.