 Save
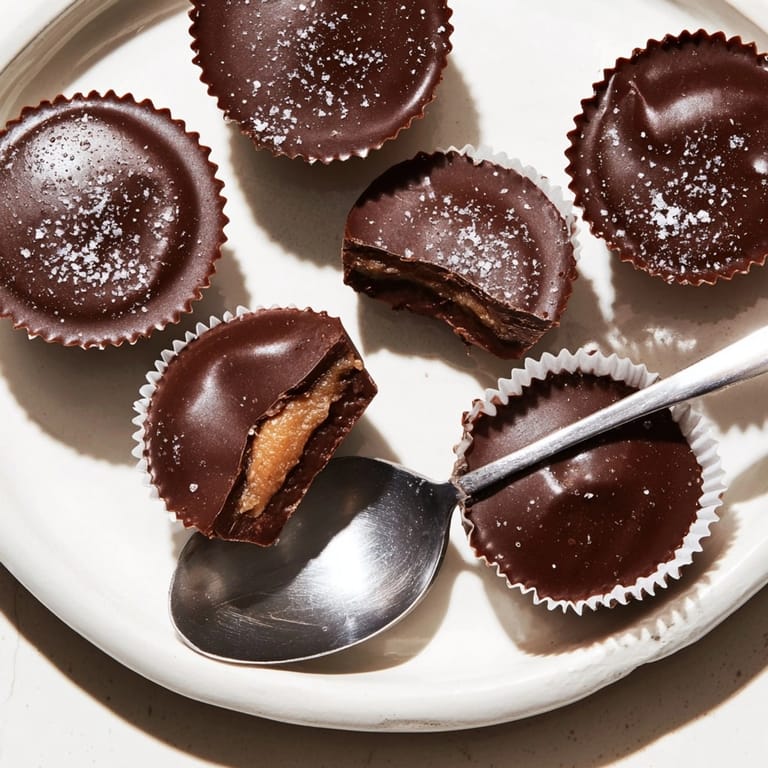
Save There is nothing quite like the classic combo of chocolate and peanut butter transformed into these homemade peanut butter cups. Creamy, salty-sweet peanut butter centers tucked inside a shell of rich chocolate always brings joy whether for snacking or gifting. Making these at home means you control the flavor and texture, and they come together in no time with just a few everyday ingredients.
These cups became a favorite during family movie nights when I wanted something nostalgic but a little elevated. Now I whip up a batch every few weeks since they store so beautifully in the fridge.
Ingredients
- Semi sweet chocolate chopped or chocolate chips: brings deep cocoa flavor and sets into a satisfying shell choose a high quality bar or chips for smoothest melting texture
- Coconut oil: makes the chocolate easier to melt and bite through adding a subtle shine optional but highly recommended for the best finish
- Creamy peanut butter: forms the luscious center select a natural style with only peanuts and salt for purest taste
- Powdered sugar: sweetens the filling and helps hold it together sift before mixing for the smoothest result
- Unsalted butter: creates rich creamy mouthfeel in the filling soften to room temperature for best blend
- Pinch of salt: enhances the chocolate and peanut flavors skip this if using salted peanut butter
- Paper liners: prevent sticking and give a classic candy shop look mini muffin pans work perfectly
Tired of Takeout? 🥡
Get 10 meals you can make faster than delivery arrives. Seriously.
One email. No spam. Unsubscribe anytime.
Instructions
- Prepare the Pan:
- Line a twelve cup mini muffin pan with paper liners pressing each gently into place This step keeps the candies from sticking and makes removing them easy
- Melt the Chocolate:
- Combine chocolate and coconut oil in a heatproof bowl Place it over barely simmering water creating a double boiler Stir until glossy and fully melted Alternatively microwave in short bursts stirring every twenty seconds to prevent scorching A smooth chocolate base is key for uniform cups
- Form the Chocolate Base:
- Spoon a teaspoon of the melted chocolate into each liner Swirl or nudge with a spoon to coat the bottoms evenly Chill the pan in the freezer for about ten minutes to set the layer
- Make the Peanut Butter Filling:
- While the chocolate firms up mix peanut butter powdered sugar butter and salt until thick and smooth This makes a cohesive not too sticky filling
- Shape and Add Filling:
- Scoop or roll twelve peanut butter balls using about a teaspoon each Flatten slightly then place one piece onto each chilled chocolate base Press gently if needed to spread toward the edges
- Seal with More Chocolate:
- Cover each peanut butter disc with another teaspoon of melted chocolate making sure no filling peeks out Use a spoon to spread and seal the edges completely
- Smooth and Chill:
- Tap the pan gently on the counter so the tops level out This helps your cups look professionally made Refrigerate for thirty minutes or until fully set
- Store and Enjoy:
- Once chilled these are ready to eat or transfer to an airtight container for storage in the fridge They will keep their texture and flavor for up to a week
 Save
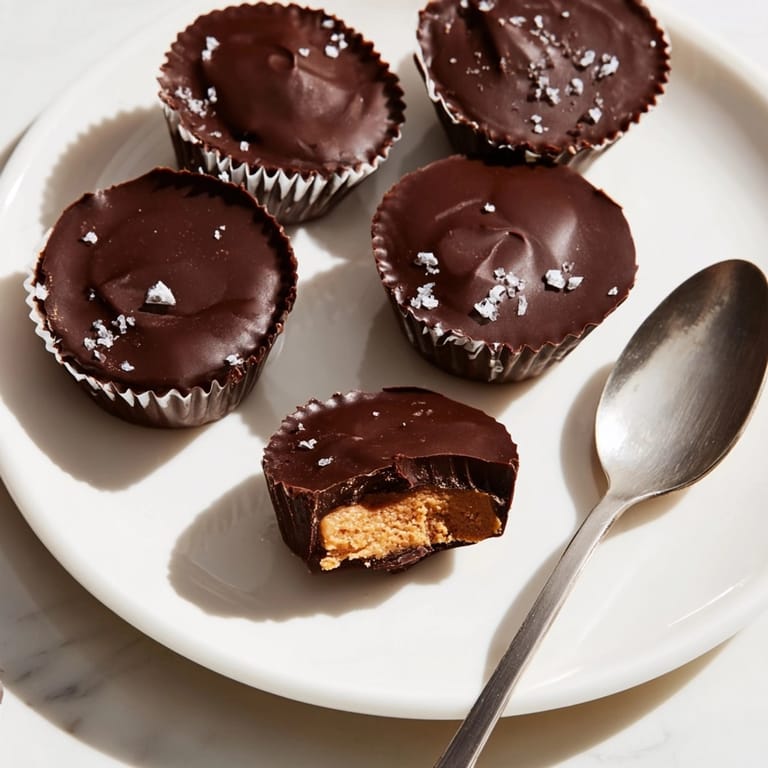
Save I absolutely love using a good old fashioned creamy peanut butter because it melds perfectly with the chocolate Shells made with coconut oil are my personal favorite since they have just the right bite and sheen My family always sneaks a cup or two before they are chilled so I have to hide a few for myself
Storage Tips
Homemade peanut butter cups will hold best in a tightly sealed container in the fridge Keep a piece of wax paper between layers to prevent sticking If you need to store them longer freeze them in a single layer for up to two months and thaw in the fridge as needed
Ingredient Substitutions
Experiment with dark chocolate or milk chocolate for distinct flavors For nut allergies sunflower seed butter or tahini work just as well You can use maple syrup or honey in the peanut filling for a slightly different sweetness and gluten free folks are all set since there is no flour
Serving Suggestions
Serve straight from the fridge for the firmest bite or let them sit at room temperature for a few minutes for a softer texture These make delightful gifts when tucked into small boxes with a ribbon Stack a few with a note for a handmade treat everyone adores
Cultural and Historical Context
Homemade peanut butter cups are an American classic inspired by the commercial treat but with a fresher richer flavor The popularity of this sweet salty bite is rooted in decades of nostalgic desserts and creative home cooking and making them at home has become a beloved family tradition in many kitchens
Seasonal Adaptations
Add a sprinkle of flaky sea salt before chilling for a fancy touch Try adding a dash of cinnamon or espresso powder to the peanut butter for a twist Shape them into hearts or trees with themed liners for holidays
Success Stories
Since sharing this recipe with friends I have heard stories of teachers using them for classroom parties and one reader even made a double batch as wedding favors They always disappear fast and everyone is amazed they are homemade
Freezer Meal Conversion
These cups freeze beautifully Place them on a baking sheet in a single layer to freeze then transfer to a freezer bag or container They stay fresh and tasty straight out of the freezer with just a few minutes thaw time
 Save
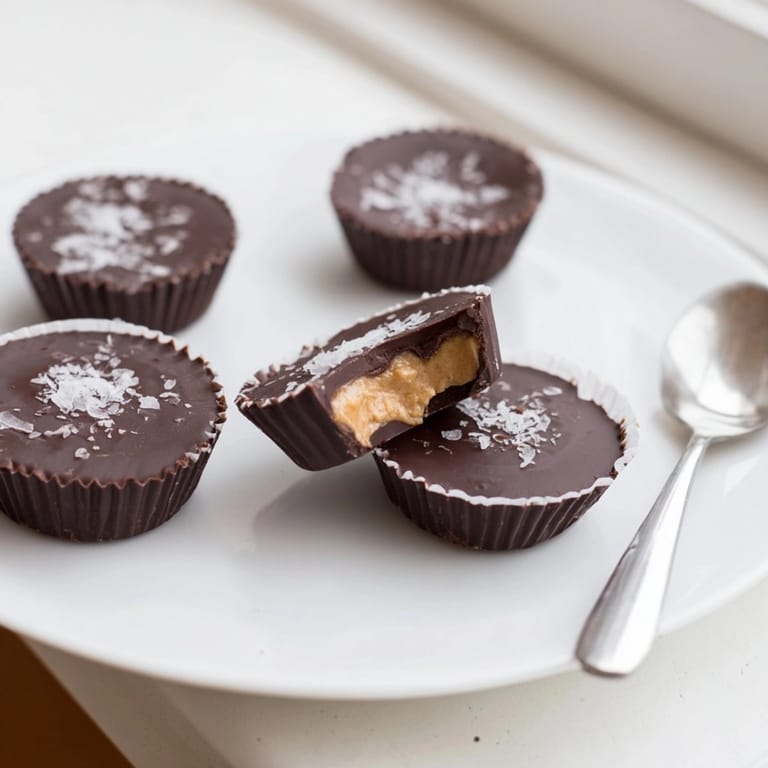
Save Enjoy making these peanut butter cups for a treat that never fails to please. One batch and you'll see why homemade is the way to go.
Kitchen Guide
- → How do I melt chocolate for these cups?
Melt chocolate using a double boiler on low heat or microwave in short bursts, stirring until smooth.
- → Can I use crunchy peanut butter?
Yes, crunchy peanut butter adds texture and can replace creamy peanut butter in this treat.
- → How should I store peanut butter cups?
Store the cups in an airtight container in the refrigerator for up to one week to maintain freshness.
- → Are these cups suitable for vegan diets?
Use dairy-free chocolate and plant-based butter for a tasty vegan-friendly option.
- → What equipment do I need?
A mini muffin pan, paper liners, mixing bowls, and a spoon or spatula are needed for assembly and mixing.
- → Can I add sea salt on top?
Yes, a sprinkle of flaky sea salt before chilling adds a gourmet finish to each cup.