 Save
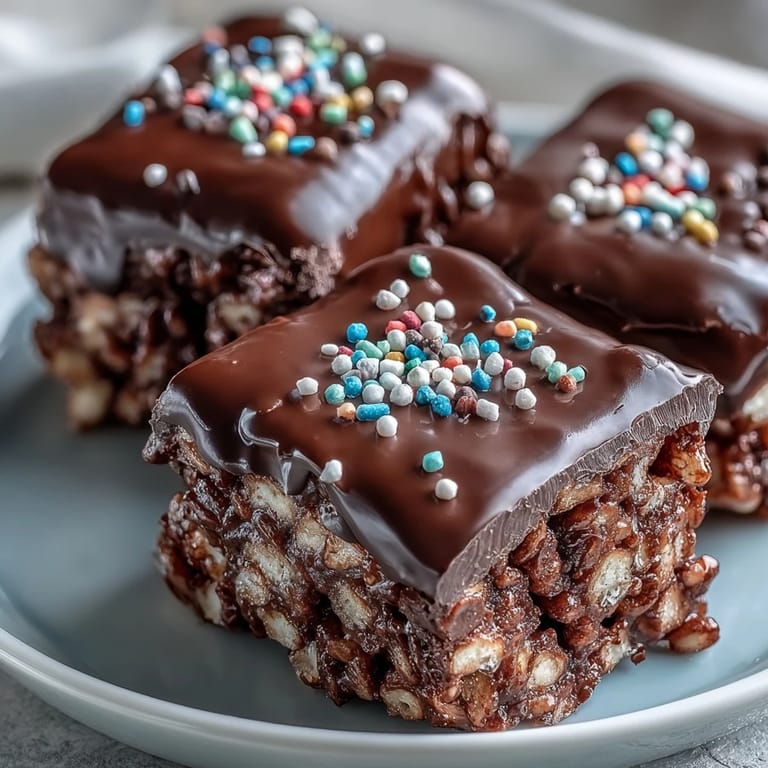
Save The first time I made chocolate covered Rice Krispy treats was actually a happy accident. I'd planned to make regular treats for a friend's birthday, but someone had left a bag of chocolate chips on the counter and I just thought, why not? The smell of melting marshmallows filled my kitchen, that sweet childhood perfume that instantly transports you back to being six years old.
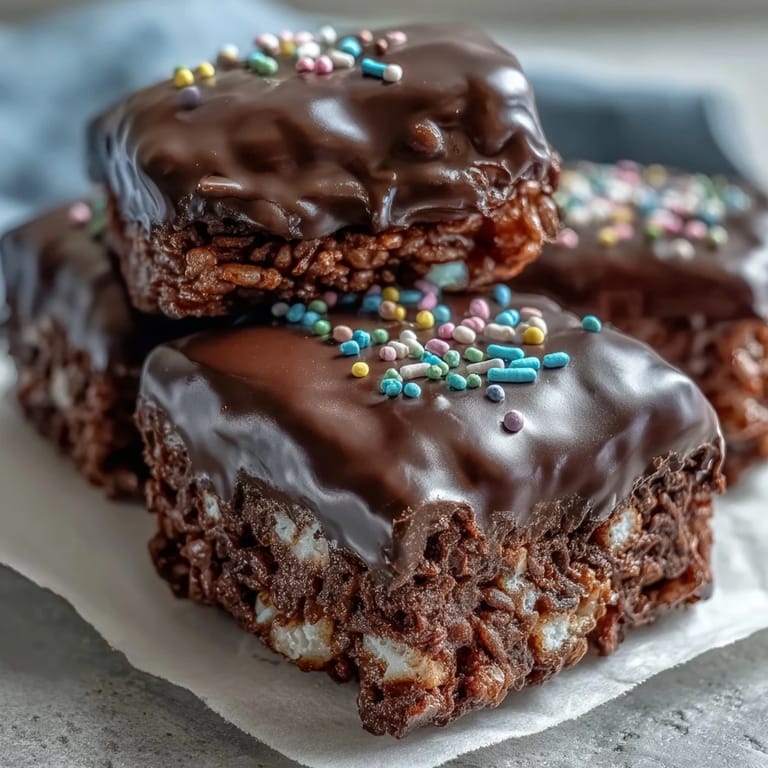
I brought that first batch to a small dinner party, and my friends literally stood around the kitchen counter eating them before we even sat down to dinner. Something about that crisp snap through the chocolate, then the familiar crunch of cereal, then the gooey marshmallow underneath—it hits every texture craving at once.
Ingredients
- Unsalted butter: Use the real stuff here because salted butter throws off the delicate sweet balance and you want that pure buttery marshmallow flavor
- Mini marshmallows: These melt so much faster and more evenly than the big ones and you avoid those stubborn un-melted lumps
- Rice Krispies cereal: Fresh boxes make all the difference because stale cereal just wont give you that satisfying crisp texture
- Fine sea salt: Even just a tiny pinch cuts through the sugar and makes all the flavors pop
- Semisweet chocolate chips: I prefer semisweet over milk chocolate here because it provides enough contrast to the super sweet marshmallow base
- Vegetable oil: This little trick makes the chocolate melt into a glossy, dippable consistency instead of staying thick and gloppy
- Rainbow sprinkles: Completely optional but they make these look absolutely irresistible and festive
Tired of Takeout? 🥡
Get 10 meals you can make faster than delivery arrives. Seriously.
One email. No spam. Unsubscribe anytime.
Instructions
- Get your pan ready:
- Butter an 8x8 or 9x9 inch pan thoroughly, getting into all the corners, then line it with parchment paper leaving overhang on opposite sides like handles
- Melt the butter:
- Drop the butter into a large saucepan over low heat and keep it moving with your spatula so it melts gently without browning or burning
- Make the marshmallow base:
- Dump in all the mini marshmallows at once and keep stirring constantly until they've completely dissolved into a smooth, glossy white pool
- Add flavor depth:
- Remove from the heat immediately and stir in that pinch of sea salt if you're using it
- Combine cereal and marshmallow:
- Pour in all the cereal at once and fold it gently with your spatula until every piece is coated in that sticky marshmallow goodness
- Press into the pan:
- Transfer the mixture to your prepared pan and use a buttered spatula or your hands to press it down firmly and evenly
- Let it cool briefly:
- Let the pan sit at room temperature for about 10 minutes while you get the chocolate ready
- Melt the chocolate:
- Combine chocolate chips and oil in a microwave safe bowl and microwave on medium power in 30 second intervals, stirring after each, until completely smooth and glossy
- Spread the chocolate:
- Pour the melted chocolate over the cooled cereal base and use an offset spatula or the back of a spoon to spread it into an even layer
- Add the finishing touch:
- Scatter rainbow sprinkles over the chocolate immediately while it's still wet so they stick
- Let everything set:
- Leave the pan at room temperature for at least an hour or pop it in the fridge for 20 to 30 minutes until the chocolate is firm
- Cut into bars:
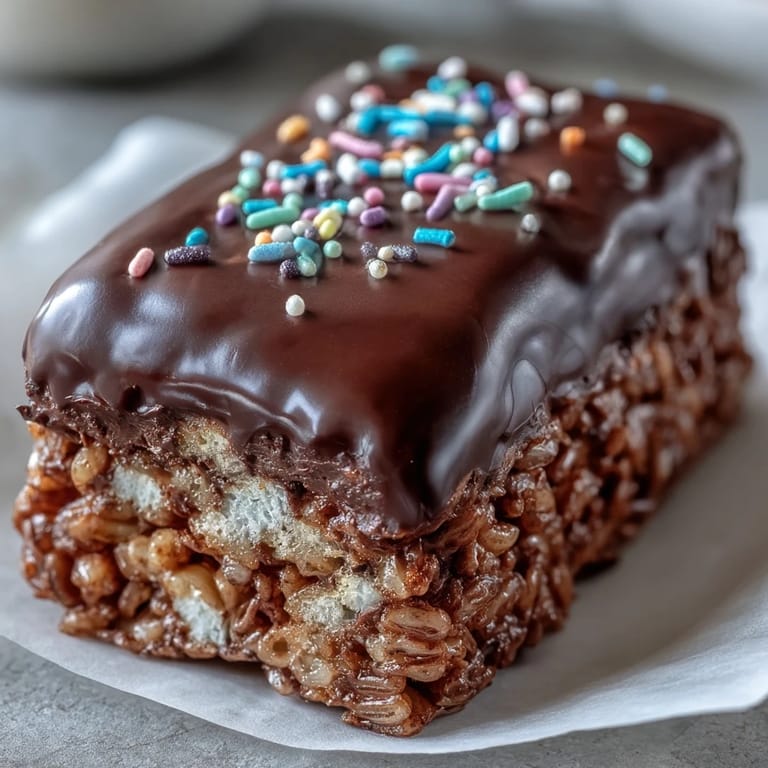
- Lift the whole block out using the parchment handles and cut into 12 to 16 squares with a sharp knife
 Save
Save These became my go to contribution for every potluck and bake sale after that first successful batch. There's something so satisfying about making something that feels both nostalgic and slightly fancy at the same time.
Make Ahead Strategy
I've learned through experience that these actually taste better the next day after the flavors have had time to meld. You can make the cereal base up to two days ahead, wrap it tightly in plastic, and add the chocolate topping the day you plan to serve them.
Chocolate Variations
While semisweet chocolate is my classic go to, I've experimented with dark chocolate for a more sophisticated version and white chocolate with crushed candy canes during the holidays. Each variation brings something different to the table but that same irresistible texture combination.
Storage Secrets
These will keep at room temperature for three days in an airtight container, though in my house they rarely last that long. If you need to store them longer, the fridge extends their life to a week but let them come to room temperature before serving for the best texture.
- Layer between parchment paper in your storage container to prevent sticking
- Never freeze these or the cereal will become sad and soggy when thawed
- Individual bar wrappers make these perfect for lunchbox treats or gift bags
 Save
Save Watch them disappear faster than you can say chocolate covered childhood memories.
Kitchen Guide
- → How do I prevent the cereal mixture from sticking to my hands or spatula?
Lightly buttering your spatula or hands before pressing the mixture into the pan will make the process much easier and prevent sticking. You can also use parchment paper to line the pan for easy removal.
- → Can I use a different type of chocolate for the topping?
Absolutely! While semi-sweet or dark chocolate chips are common, you can use milk chocolate, white chocolate, or even a combination. Adjust the melting time accordingly, as different chocolates have varying melting points.
- → What's the best way to store these treats?
Store them in an airtight container at room temperature for up to 3 days. For longer storage, they can be refrigerated for up to a week. If refrigerated, let them sit out for a few minutes before serving for optimal texture.
- → Can I add other ingredients to the cereal mixture?
Yes, you can! A popular addition is ½ teaspoon of vanilla extract stirred into the melted marshmallows for extra depth of flavor. You could also fold in mini chocolate chips or chopped nuts into the cereal mix before pressing.
- → My chocolate topping isn't glossy. What went wrong?
Adding a small amount of vegetable or coconut oil to the chocolate chips before melting helps create a smooth, glossy finish. Ensure you don't overheat the chocolate, and stir well during the melting process. For a professional sheen, temper your chocolate.
- → Is it necessary to let the treats set for so long?
The setting time is crucial for the bars to firm up properly and for the chocolate to set, preventing a sticky mess when cutting. While room temperature takes about an hour, refrigerating for 20-30 minutes can speed up the process significantly.